
Stained Glass Chandelier
- kydo5322
- Dec 17, 2018
- 3 min read

Updated: Dec 19, 2018
At the start of this class, I had no idea what I was going to do, I just wanted to learn how to make things. I'm not sure why, but I decided to learn how to make stained glass art. I went into this project blindly, but I have learned a new and intense craft, which is a cool thing to learn in school.
Intro to Stained Glass
My foray into stained glass was an eye-opener. Turns out working with glass is incredibly dangerous and requires a lot of room. Glass particles fly everywhere, you have to work with lead fumes and zinc flux, you are constantly cutting yourself; you need a space with good ventilation and plenty of counter space. I did not have any of this at my disposable, so I had to make a pop-up studio in my kitchen, which my roommates did not appreciate.


As an introductory project, I made a leaf ornament. I bought a beginner's stained glass kit from Etsy, found a leaf template online, and got to work. From this project, I learned that soldering is hard and working with lead-free solder just makes it harder. I believe the finished product was pretty good for my first try, but the soldering was terrible.

Final Project
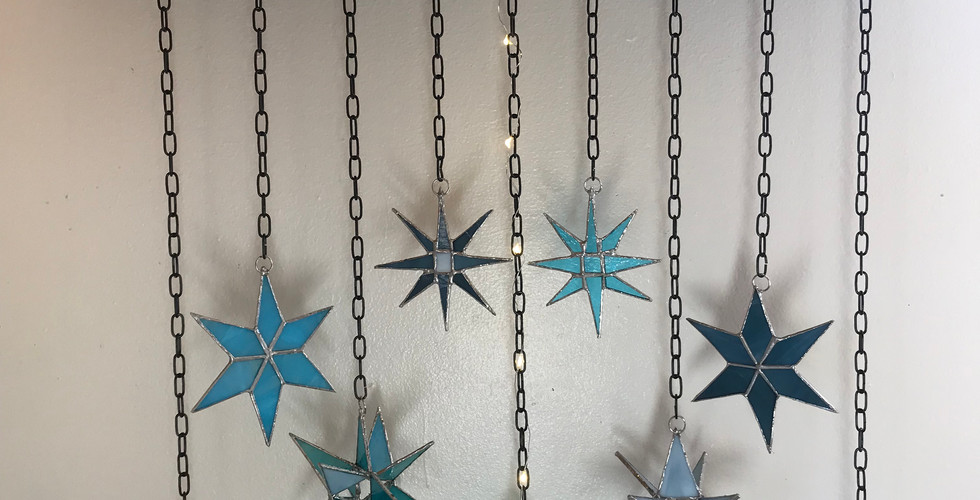
A theme I explore a lot in my artwork is stars. I doodle them all over my notebooks and I am inspired by Van Gogh's Starry Night. So I decided to channel this into my stained glass. I wanted to make a chandelier of some sort that would show I was capable of making flat stained glass and three-dimensional pieces. I used a myriad of semi-transparent blue glass to create four different styles of stars. I figured the best way to showcase my work would be by hanging the glass to a reclaimed wood plank. The roughness of the wood balances out the fragility of the glass. I also made sure the position of each star mirrored each other to add to the balance.
I was a bit ambitious with what I wanted to accomplish with this project. I wanted to create 3 stained glass Moravian star pendant lamps. As the semester progressed it went down to 2 and then 1 and then none. The finished product was a 3D Moravian star that I placed twinkle lights in and not an actual lightbulb with flat stained glass accents.
I approached this project from an aesthetic side, as opposed to a utilitarian side. My hope was to create something beautiful that would draw people's attention without being too flashy. Similar to the way people react when they see a really cool lamp. I think I achieved this effect, however, when you do get drawn in you start to notice that the piece is not as nice as you initially thought and that is because I am a novice to stained glass. Overall, I am less than pleased with a lot of aspects of my project, but I am proud that I taught myself how to do everything and that I actually finished it.


Brainstorming & Planning
I had lots of ideas on what I could do for this project; create a stained glass window pane, interesting polygon shelves, but in the end, I opted for a star mobile/ chandelier hybrid.

Materials
This project made a sizable dent in my wallet, but it was (kind of) worth it. So if you ever want to recreate this project, here is what you'll need:
-Lamp oil
-Safety goggles
-Mask
-Glass (I used roughly x sheets of x by x)
-Solder
-1/8" Copper foil
-Screw hooks
-Chains
-Wood beam
Process
For each piece, I follow a similar process.
1. Create a pattern. I would sketch out a star and then cut out the pattern and trace onto star.

2. Cut glass.

3. Sanding glass.

4. Foil glass.

5. Apply flux and solder

It gets a little more complicated when you make something 3 dimensional.

Progress
As I worked I ran into a plethora of problems. Number one of those mistakes was my timing, as with most college students, I procrastinated. I was constantly rushing for time, which lowered the quality of my work. Number two: soldering. After I just thought I was bad at soldering, like really bad. I was getting better at everything else, except soldering, but then I realized my soldering iron is terrible. It gets too hot and I can't control the temperature of it, so it would get all ashy and leave debris in the solder, making the edges rough. Besides these issues, you can see progress in the stars.
Iteration 1

Iteration 2

Iteration 3

Final

Taking it Further
If I could do this project over, hopefully with more time and less other school work getting in the way, I would make more iterations of the center piece star and go over all the solder joints with black patina. I would have also liked to spent more time practicing soldering.

Comments